The HTC Vive Review
The HTC Vive has all of the ingredients to successfully challenge the Oculus Rift, including its 6DoF hand controllers, the ability to walk around in virtual spaces and 100+ games on the way.
Why you can trust Tom's Hardware
System Requirements & Setup Procedures
The HTC Vive demands similar system performance as the competing Rift, which makes sense given that they share similar display specifications. Both HMDs should be driven by a Core i5-4590 equivalent (or better) processor. Oculus doesn't specify a model from AMD, but HTC and Valve say you'll want an FX-8350 or better.
Like the Rift, HTC's VR system recommends at least a GeForce GTX 970. But for some reason it's a little friendlier to AMD's cards. Purportedly, you can get away with a Radeon R9 280, which isn't far off of a GeForce GTX 960. We aren't sure how those two cards achieve parity, but we aim to find out.
As we noted in our Oculus Rift review, it really comes down to simple math. A lower-end GPU can't keep up with the number of shaded pixels needed for 2160x1200 at 90Hz, especially when you consider the 1.4x scalar used to correct spatial distortion. Then you’re really talking about 1512x1680 per eye at 90Hz, which would be more than 400 million shaded pixels.
In 2015, Alex Vlachos, Valve Software senior graphics programmer, gave a talk called “Advanced VR Rendering” wherein he described how the scalar can be dialed back for more performance, but even then, today’s top-tier GPUs still struggle to keep up. We’ve been told that Valve is working on making VR titles scale quality dynamically to maintain steady rendering performance. You can already see examples of this graphics scaling technique in the SteamVR Performance Test. This free utility runs a benchmark on your system and spits out a grade of Ready, Capable or Not Ready based on your overall performance. Capable systems typically land somewhere just below the minimum specifications, but the test scales graphics quality back as needed in order to maintain a steady frame rate above 90 FPS. In our testing, an R9 380 is rated Capable, so it seems unlikely that an R9 280 would suffice.
You Probably Do Have Enough Space
The three main VR systems have much in common, but the Vive has one thing that sets it apart from the others: the ability to offer room-scale VR right out of the box. The Rift is technically capable of this, but it really wasn’t designed with that in mind, and until Oculus Touch comes out, it's a moot point anyway. The Vive includes everything you need right now.
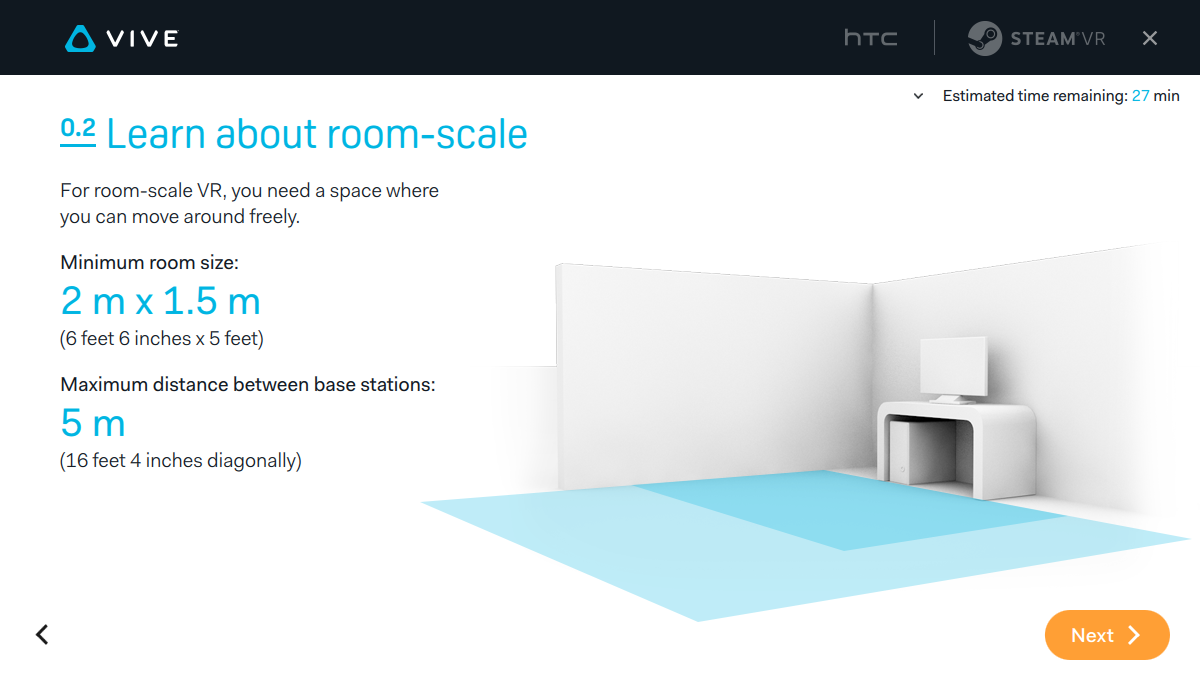
The two base stations sit in opposite corners of your room. The maximum space between them shouldn’t exceed 16.4 feet diagonally, which allows for a trackable space as large as 15x15 feet. That sounds scary, but it shouldn't be. You can easily scale the space down to fit a more realistically-sized bedroom or office and still derive just as much enjoyment from it.
HTC has had a hard time explaining this aspect of the Vive because so much attention is devoted to the maximum size. Fifteen square feet is a lot of open space, and you aren’t going to find many homes with large, empty rooms. No matter; you can set the Vive up for room-scale in a space as small as 6.5x5 feet. Most living rooms can accommodate that by moving a coffee table temporarily, and many offices can be reconfigured accordingly, too. It’s also important to note that those dimensions are for walking space. If you use a space smaller than 15x15 feet, you can still reach your arms beyond obstacles like couches, so long as the controllers remain in view of the base stations.
Get Tom's Hardware's best news and in-depth reviews, straight to your inbox.
If you still can’t possibly clear that much open area, don’t write the Vive off just yet. The system is fully compatible with sitting and standing experiences too. Many games also have a tabletop mode for seated gaming.
Setting Up The Vive
To configure the Vive for room-scale VR, first make sure you clear obstacles out of the way. You need the entire floor of play space free from anything that'd put you on your face. Then, once you've figured out the dimensions of your VR-friendly zone, download and run the HTC Vive software setup package. It'll walk you through the step-by-step process of setting up the HMD as it pulls down the rest of the driver utility. The utility claims you'll be done in as little as 28 minutes, but if you need to wall-mount the base stations, that's unlikely.
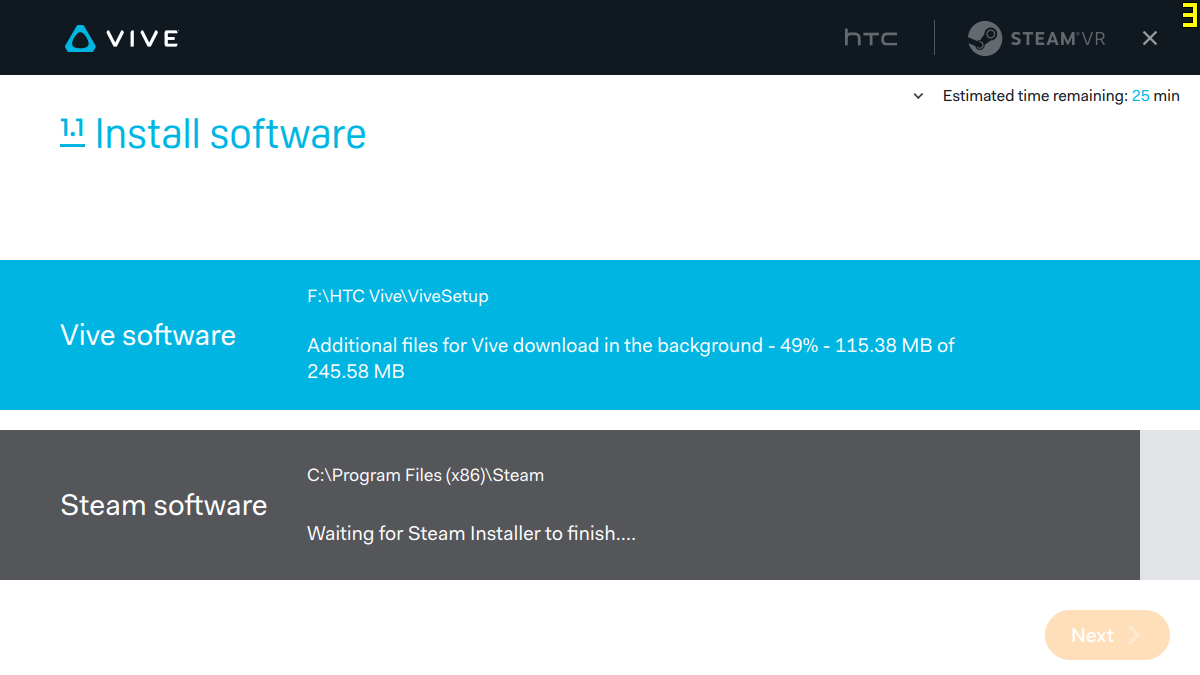
The Vive software package weighs in at 524MB, but once you’ve downloaded the first 18%, you’re prompted to create or log in to an HTC account. The download will not continue until you do this. The install checks to see if you have Steam installed. If not, it'll also grab that for you.
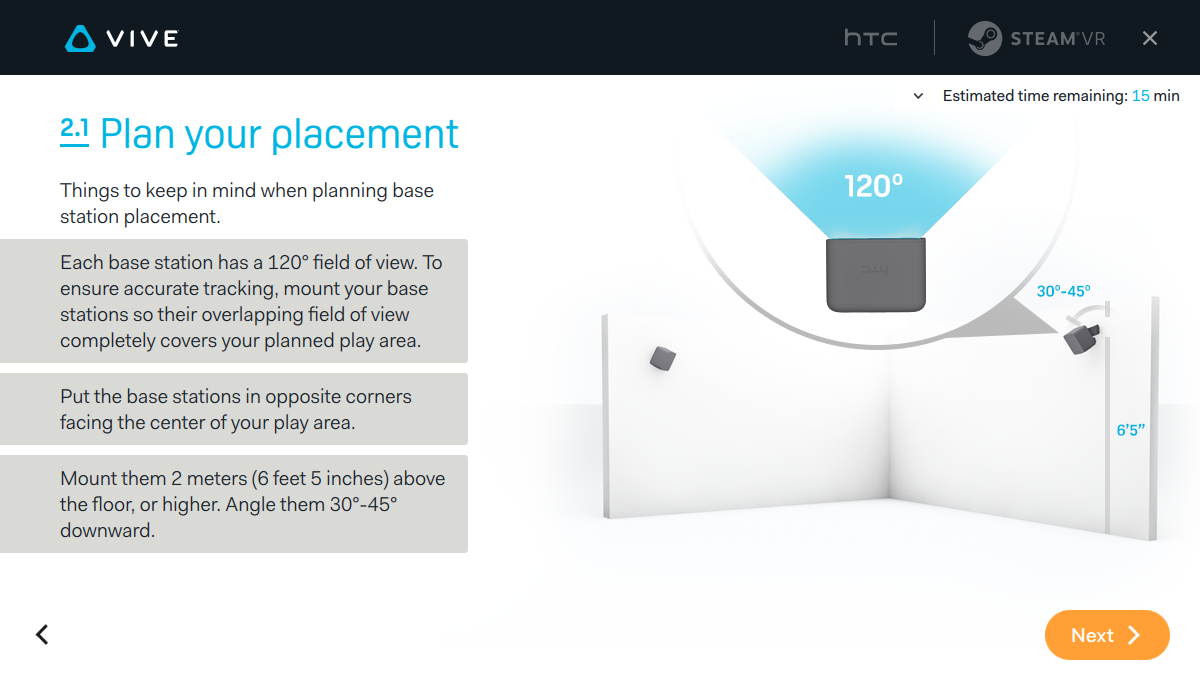
Once the download reaches 50%, it lets you move on to the hardware setup. The first thing you're prompted to do is set up the base stations. HTC recommends that you mount them securely to your wall at least 6.5 feet from the ground, but the higher the better. The package includes a pair of wall mounts so you won’t have to buy anything extra to get started.
Base Stations
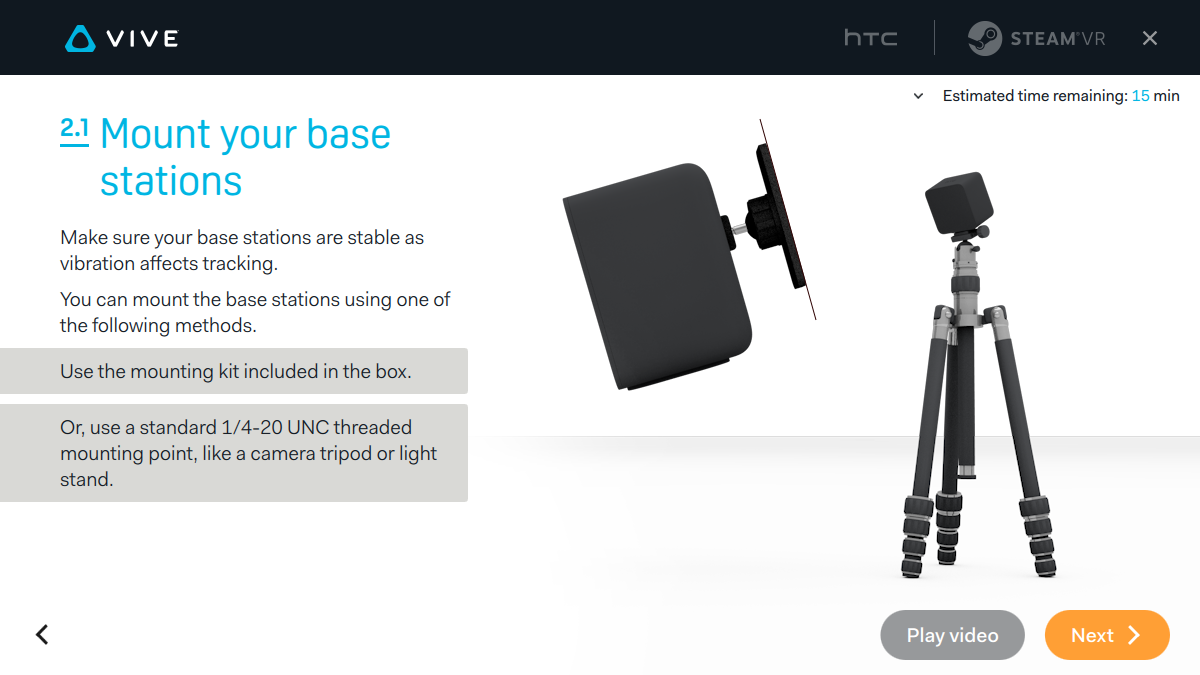
Wall mounting is recommended because vibration does affect tracking. But if you can’t drill holes into your wall because you rent or game in a concrete basement, you can still elevate them a few different ways. Each station includes two threaded points accommodating tripods. HTC also says you can use clamps to attach the stations to a bookshelf. The key is securing them well.
Wherever you mount the base stations, make sure you have a power outlet nearby. They don't require a connection to your computer, but they do require a power source. Given their recommended 6.5-foot elevation, the bundled 10-foot power cords are a little short. It'd be nice to get an extension cable for the AC adapters with an inline power switch. As they come, though, you have to unplug the stations to shut them down between uses. A silver lining is that the base stations support power management when you enable Bluetooth in the Vive settings panel. With power management enabled, the stations go to sleep when the headset does.
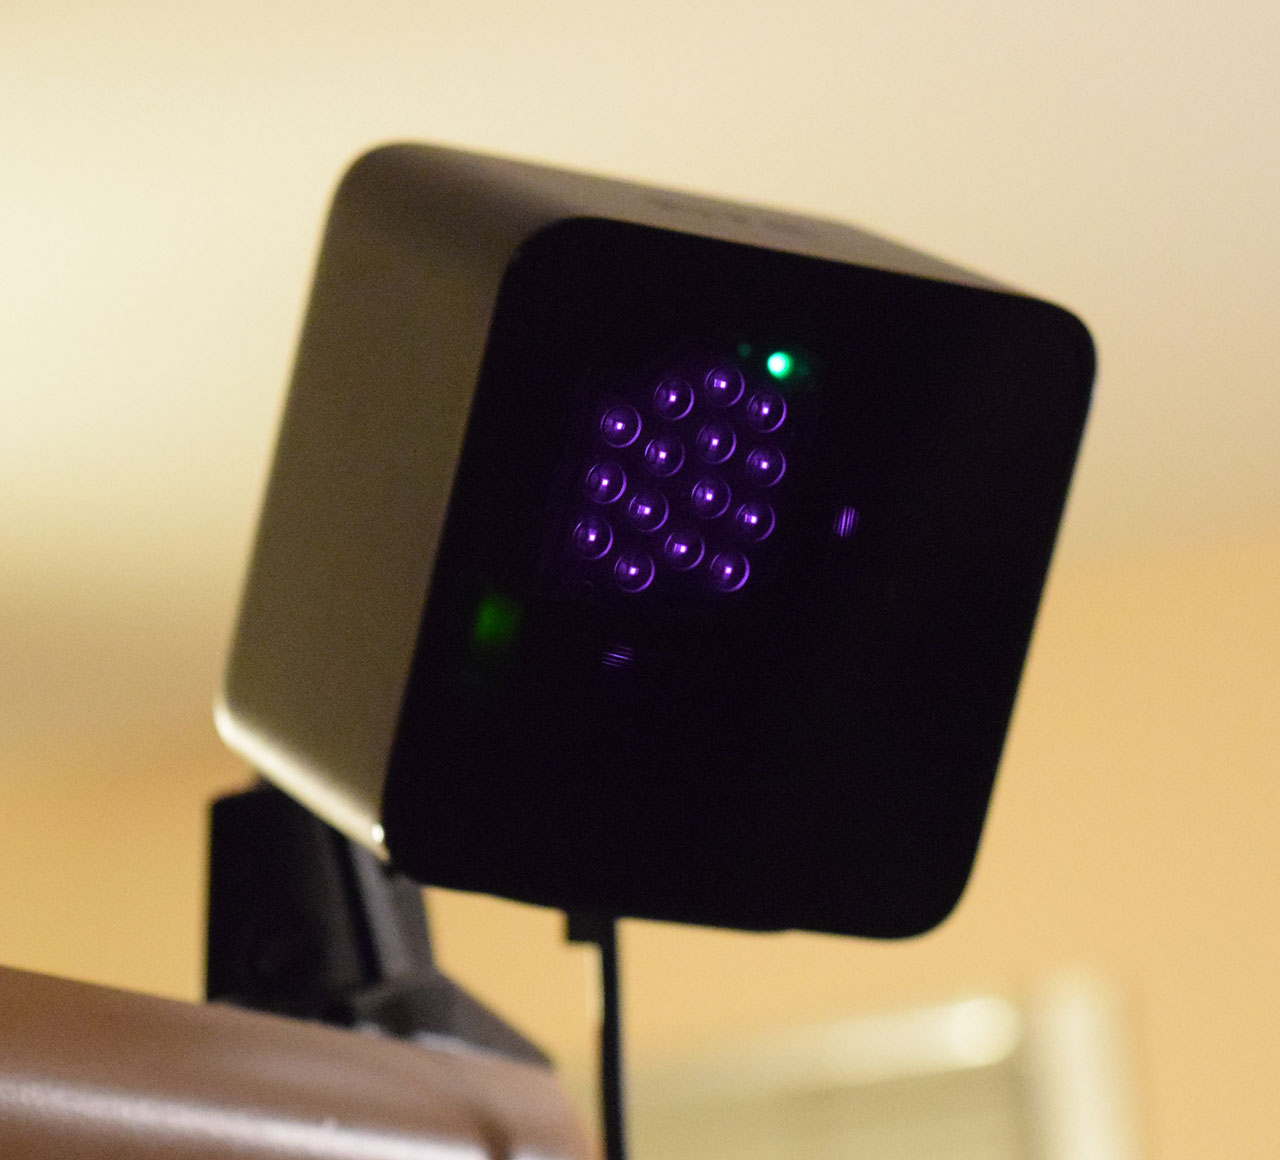
Once you have the base stations mounted, plug in their power. You should see a light indicating station status; a set of red lasers behind the screen; and a light indicating whether the base station is on channel A, B or C. If you positioned the stations where they can see each other, the status light should be green.
If you see a purple-ish blue light, the base stations don’t see each other and require a position readjustment. Or, you may need to use the included sync cable. The sync cable is fifty feet long, so you should be able to run it around the perimeter of almost any room without trouble. If you have a drop ceiling, it would be easy to run the cable above the tiles. If your setup requires the sync cable, you need to change the channel of one station manually using a button on the back of the unit.
Headset And Controllers
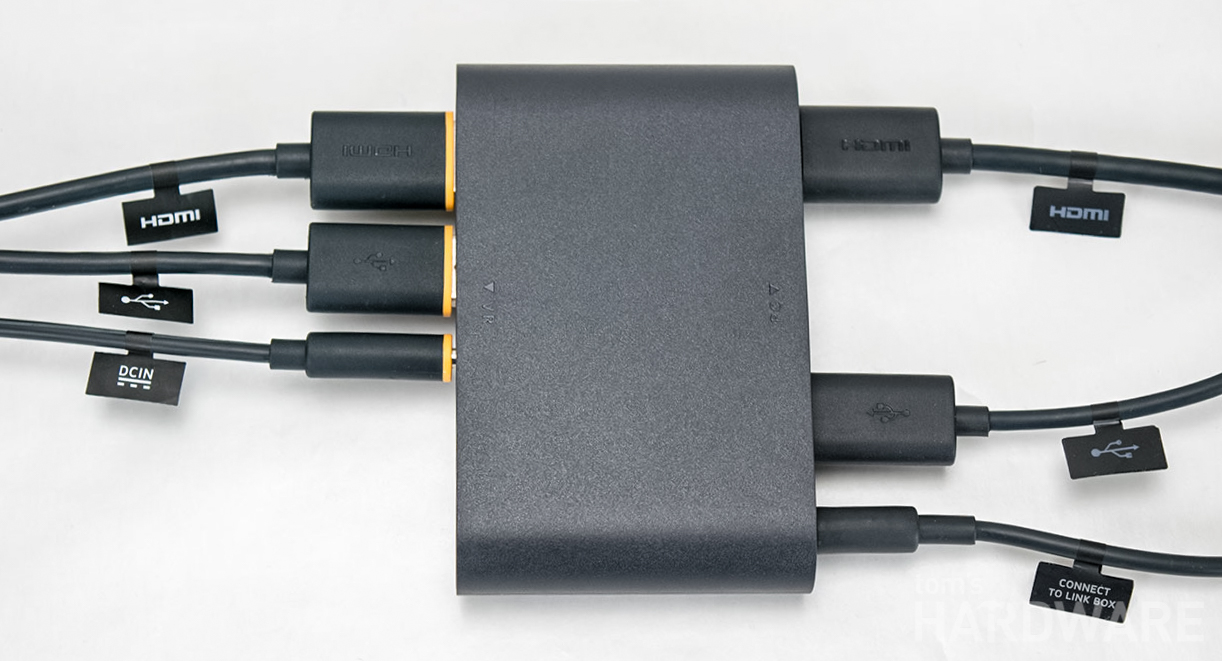
Once the base stations are communicating with each other, you’re prompted to locate the headset and link box. The link box should be plugged into the computer before it is plugged into the Vive. First plug in the power source, followed by the USB 3.0 cable and then HDMI. It’s the same process for the headset: power, USB, HDMI. If it happens that you do not have an HDMI port on your computer, you can use a mini-DisplayPort-to-DisplayPort cable, although you'll have to buy that separately.
HTC goes the extra mile to make setup as easy as possible. For example, it labels each cable, clearly indicating what it is or where it goes. What’s more, the link box and its cables are also color-coded.
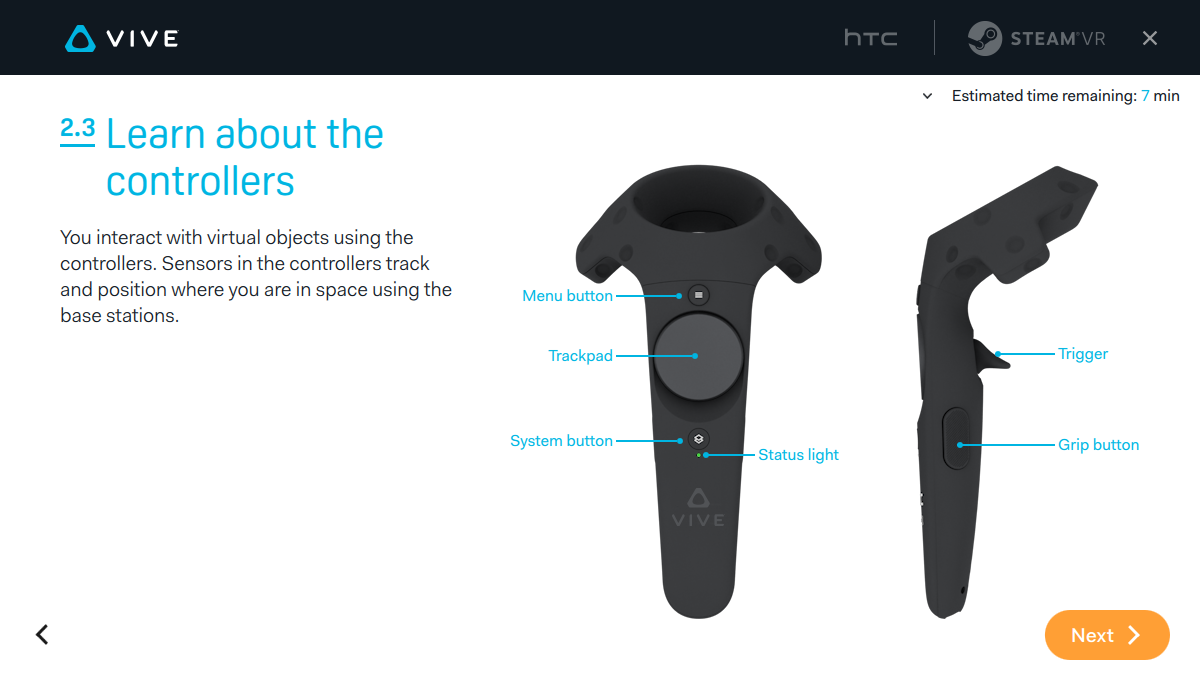
Next up is the controllers. To turn them on, press the system button (located directly below the trackpad). The status indicator should light up blue, and when the controllers sync and start tracking, the light turns green. HTC ships the controllers with more than enough charge to complete the setup and play a few games, so you don’t have to worry about charging them first.
At this point, if the Vive software download is complete, SteamVR opens up and you’re asked to choose between the room-scale or standing-only setup procedures.
Room-Scale Calibration
If you choose the room-scale option, SteamVR again asks you to clear your space and make sure you have at least the minimum-sized play area. The software detects the headset and the controllers. If there’s a problem with tracking, you cannot proceed.
The next step is to calibrate your monitor’s position. SteamVR asks you to stand in the middle of the room, point a Vive controller at your computer monitor, and then press and hold the trigger. The monitor position is used to help orient the view of the room-tracing preview screen found in the next step.
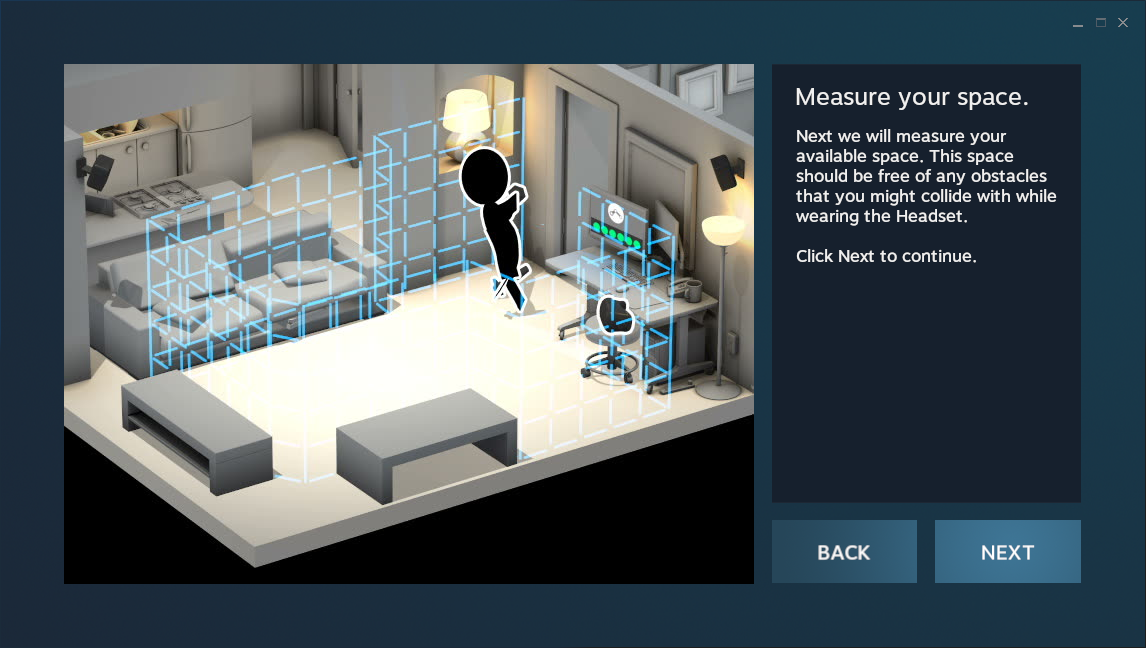
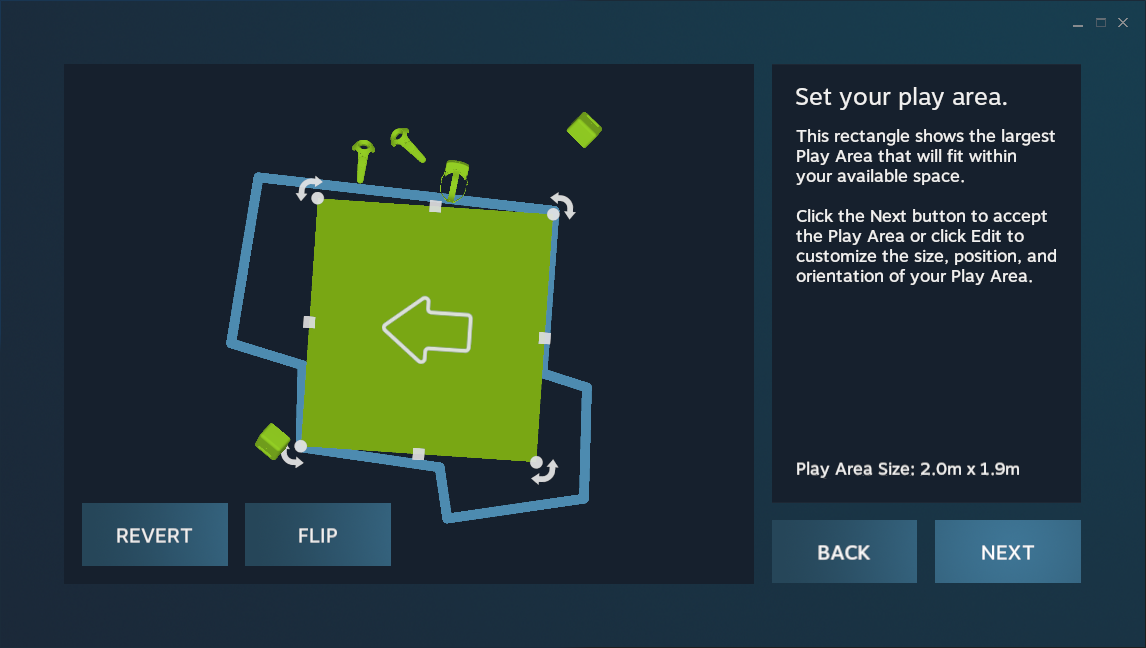
The Vive has a helpful feature called Chaperone that helps to keep you from killing yourself as you navigate the room with a headset over your eyes. How thoughtful. But the barriers have to be set up manually; the system doesn’t automatically detect the space you can play in. To set your Chaperone boundaries, take one controller, pull the trigger, and trace around the edges of your open area. Avoid getting too close to the wall or other objects when tracing the boundaries. If you have the space, I’d suggest staying a foot or more away from the edges.
When tracing your play space, make sure that you take into account all of the open area that you want to access, not just a square. You can map around objects like couches and bookshelves to create oddly-shaped tracking areas. As long as the base stations can see the headset and controllers, you can walk outside the minimum space. You just need at least a 6.5x5-foot area to work in. Objects you trace around must be outside the green zone.
SteamVR automatically determines the largest square or rectangular space possible and what it thinks is the best orientation for it within your given area. If you aren’t keen on what SteamVR suggests, edit the orientation and even shrink the size of your play space to provide more buffer around obstacles.
Current page: System Requirements & Setup Procedures
Prev Page What's In The HTC Vive Box Next Page Health, Safety & MaintenanceKevin Carbotte is a contributing writer for Tom's Hardware who primarily covers VR and AR hardware. He has been writing for us for more than four years.
-
comedichistorian Well it looks like as of 7:30 AM on April 5th you can't order one from the official site if you're from the US or Australia. It doesn't say this anywhere on the site, they just won't let you continue on after the order summary. However, if I select "Ireland" as my location I am able to go to the next step and presumably complete the order. Anyone have any ideas as to what this might mean? Anyone else able to actually complete an order after having selected US?Reply -
DrakeFS They have got to do something about that cable. I fully expect a base station and belt receiver accessories to be sold soon, probably not by HTC\Oculus though. The latency that a wireless solution would add to an application sensitive to latency may be the reason both HMDs are cabled. Then again, it could just be cost, after all $800 sounds a lot better than $1000.Reply
Guess if it annoys me enough, I could always do a ceiling mount. -
comedichistorian Ooooh yeah I like that idea. An easy/cheap yet surprisingly reliable option would be one of those Command Strip units. Get a few loops that'll hold 5lbs and mount them wherever needed in your room and you're done. Those things really hold up, I've mounted heavy pictures with them and they've been holding up fine even with all the temp changes and a small quake we got here.Reply -
turkey3_scratch This makes me now want to dish out the extra $200 for this over the Oculus. Except, I actually don't have the open room, I don't even have 5x5 feet so I don't think it's a possibility.Reply -
kcarbotte ReplyThey have got to do something about that cable. I fully expect a base station and belt receiver accessories to be sold soon, probably not by HTC\Oculus though. The latency that a wireless solution would add to an application sensitive to latency may be the reason both HMDs are cabled. Then again, it could just be cost, after all $800 sounds a lot better than $1000.
Guess if it annoys me enough, I could always do a ceiling mount.Ooooh yeah I like that idea. An easy/cheap yet surprisingly reliable option would be one of those Command Strip units. Get a few loops that'll hold 5lbs and mount them wherever needed in your room and you're done. Those things really hold up, I've mounted heavy pictures with them and they've been holding up fine even with all the temp changes and a small quake we got here.
The problem with a ceiling mount is the length of the cable isn't enoug for that.
you'd have to run the cable up the wall, which would require at least 7 feet, likely more, than across the ceiling to your play space - which would be around 5 feet from the wall or more.
You might have enough range to reach your head, but you definitly won't be walking around in a room-scale space like that.
The cable is somethign we're just going to have to live with for now. It's not going away for the first generation, so get used to it. We're looking at probably two years or more with the current hardware before any major iterations hit the market. I may be wrong about that, it could end up being like the cell phone market, but for now, this is what we have to work with.
It's really not as big of a concern as people think. Yes, you are aware of it always. No, it doesn't detract from the experience enough to brush it off due to a tether. -
Borisblade7 ReplyThey have got to do something about that cable. I fully expect a base station and belt receiver accessories to be sold soon, probably not by HTC\Oculus though. The latency that a wireless solution would add to an application sensitive to latency may be the reason both HMDs are cabled. Then again, it could just be cost, after all $800 sounds a lot better than $1000.
Yeah its teh latency added by the wifi. Until someone finds some work around, its going to be cabled. It doesnt matter so much with the Rift since you can only sit on your ass and play it, but with this being superior with its ability to actually move around, being tethered can cause issues. Having said that, most every vid i've seen of people using this, it really wasnt much of an issue.
-
kcarbotte ReplyThis makes me now want to dish out the extra $200 for this over the Oculus. Except, I actually don't have the open room, I don't even have 5x5 feet so I don't think it's a possibility.
You can filter the SteamVR store to show you what is available for Standing experiences. These games still use the hand controlls, but they don't required that you walk around.
A quick search on steam showed there are 54 titles that support standing configurations and don't need room scale.
Over 30 of those titles launched today and are true VR games designed from the ground up on Vive.
http://store.steampowered.com/search/#sort_by=Released_DESC&sort_order=DESC&category1=998&tags=-1&vrsupport=101%2C302&page=1
-
kcarbotte ReplyThey have got to do something about that cable. I fully expect a base station and belt receiver accessories to be sold soon, probably not by HTC\Oculus though. The latency that a wireless solution would add to an application sensitive to latency may be the reason both HMDs are cabled. Then again, it could just be cost, after all $800 sounds a lot better than $1000.
Yeah its teh latency added by the wifi. Until someone finds some work around, its going to be cabled. It doesnt matter so much with the Rift since you can only sit on your ass and play it, but with this being superior with its ability to actually move around, being tethered can cause issues. Having said that, most every vid i've seen of people using this, it really wasnt much of an issue.
For smooth graphics in VR, the target is 11.11ms of latency. GPUs are just barely able to deliver that reliably over HDMI, adding a wireless signal in there will make it far higher, making it infeasible for the majority of people.
I'm sure there's a wireless version in some research lab somewhere, but we're likely going to have to wait a while for that to hit consumer markets. -
hoofhearted Intel NUC, GTX980 MXM, a lith battery and a backpack will solve the cable issue. Maybe something that converts methane gas to electricity combined with an anal probe will solve the power issue. Throw in a free can of beans.Reply
