
Tom's Hardware Verdict
The Flashforge Adventurer 4 is built like a tank, but the software feels unfinished.
Pros
- +
Flexible build platform is best-in-class
- +
Rigid motion system and solid construction
- +
Built-in air filtration system
Cons
- -
FlashPrint software doesn’t fully support machine
- -
WiFi has connectivity issues
- -
Nozzle assembly is relatively expensive
Why you can trust Tom's Hardware Our expert reviewers spend hours testing and comparing products and services so you can choose the best for you. Find out more about how we test.
The Flashforge Adventurer 4 is the flagship of the Adventurer line of FDM 3D printers, and features a 220 x 200 x 250 mm build volume, a flexible removable build platform, an integrated spool holder, the ability to resume a print after a power outage and more in an enclosed chamber (with built-in air filter) that feels like it could survive a drop off of a bridge. The Adventurer 4 has a list of hardware features that will certainly seem in line with what you would expect from a $799 3D printer.
Unfortunately, the software for the machine doesn’t live up to the potential of this machine, and the Flashforge-provided FlashPrint software doesn’t seem to be completely finished. After my positive experience with the Flashforge Adventurer 3 Lite, one of the best 3D printers, the Adventurer 4 felt like a disappointment when compared to other machines that offer similar features and specs.
Specifications
| Machine Footprint | 15.3 x 13.4 x 15.9 inches (38.8cm x 34.0cm x 40.5cm) |
| Build Volume | 9.7 x 7.9 x 9.8 inches (220mm x 200mm x 250mm) |
| Material | 1.75mm PLA, PLA+, ABS |
| Nozzle | .4mm (.3mm and .6mm optional) |
| Build Platform | Heated Removable Flexible Platform |
| Connectivity | USB, Wi-Fi, Ethernet |
| Interface | 4.3-inch Touchscreen LCD |
Included with the Flashforge Adventurer 4
Before we look at the included accessories of the Flashforge Adventurer 4, I want to take a moment to talk about the printer itself. The Flashforge Adventurer 4 arrived in a 24” cubed box with a shipping weight of 38 kg (about 83 lbs.) The machine itself is listed with a net weight of 20.1 kg (44.3 lbs.), which is almost two and a half times the weight of the Creality Ender 3 Pro, a printer that has a similar build volume. If machine footprint is something you’re concerned about, be aware, this is a large machine.

The Adventurer 4 includes an Allen Key set, a screwdriver, a pair of 0.05 metal shims, a pouch of grease, an additional high-temp nozzle, and a few other spare parts. The included USB thumb drive comes preloaded with a .pdf copy of the user manual, several test models in both .stl (3D model) and .gx (printable format) formats, and Flashforge’s proprietary slicer app, FlashPrint.

A major draw of printers like the Adventurer 4 is the plug-and-play nature of the machine; the printer itself arrives completely assembled and doesn’t require much in the way of assembly or wiring to get it up and running. Unboxing this printer was a bit of a challenge; it’s heavy, unwieldy, and doesn’t have any handles or grab points which make getting it out of the box and onto a table surprisingly difficult.
Setting up the FlashForge Adventurer 4

After removing the protective stickers from the Flashforge Adventurer 4, I plugged it in and turned it on. The 4.3-inch color touchscreen LCD prompted me to load filament into the printer, and guided me through the process as the printer heated the extruder. The Adventurer 4 includes a full 1kg spool of filament which fits into the integrated spool holder on the right side of the printer. This enclosed filament spool mount is a welcome change from the Adventurer 3 Lite, which was only able to accept smaller spools and not the 1kg standard spool.


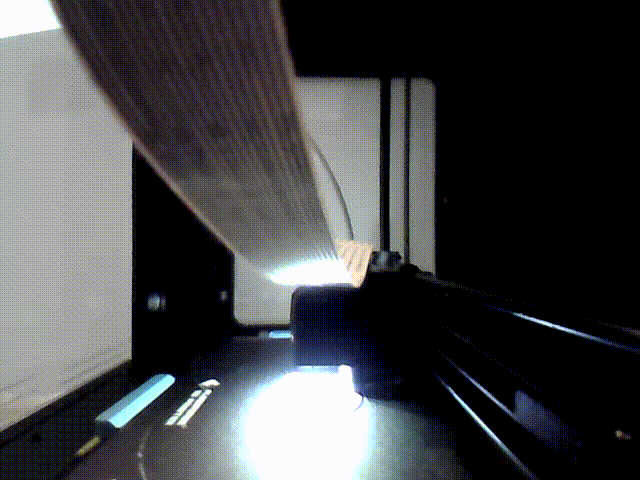
The filament is fed to the extruder via a PTFE tube that connects the extruder assembly to the hot end carriage. During the loading, I could visually verify the filament was loading through the semi-opaque tube and once it reached the hot end, it extruded with no issues. Just like the smaller Adventurer 3 Lite, the Adventurer 4 extruder doesn’t have a tension-release knob, and instead automatically feeds material as soon as it is placed into the module.


Design of FlashForge Adventurer 4


The Flashforge Adventurer 4 is an enclosed 3D printer that uses acrylic panels on the top, side, and front of the printer to keep the machine closed off during operation without reducing visibility. The front panel is held in place with magnets, and can be easily opened using the molded handle integrated into the panel. This style of design differs from the open frame found on printers like the Elegoo Neptune 2, which typically are more sensitive to environmental changes and have difficulty printing high temperature materials. Having an enclosed 3D printer also offers some protection against children or pets sticking their hands or paws on your project, though an unattended toddler can still open the door, which does not pause the printing process.

The front door on the Adventurer 4 can be opened without pausing the print, so it’s possible to make minor adjustments to the model during printing if needed (removing strings, clipping fallen features, etc.) without having to automatically stop the print. The benefit of leaving the door shut is the heat from the platform is captured and retained in the chamber, so changes in ambient temperature caused by air conditioning won't affect the print, especially on high temperature materials like Nylon, ABS, etc.

(Image Credit: Flashforge)
The Adventurer 4 uses the same removable nozzle assembly as the Adventurer 3 Lite (and Adventurer 3). This nozzle assembly is available in a variety of size and temperature combinations, and the printer ships with two .4mm nozzles, one 240C and the other 265C. These replaceable nozzles are ideal for users who print a variety of geometries; the .3mm 240C nozzle works well for printing smaller, more detailed models while the .6mm 265C nozzle is perfect for high-flow applications where printing a large model quickly is the desired outcome.


The removable nozzle is proprietary to the Flashforge Adventurer series, as opposed to the standard nozzles found on printers like the Creality Ender 3 Pro. This is a benefit to users who are looking for maximum uptime; it took me under a minute to swap out the nozzle and didn’t require any tensioning or adjustments. The downside is the cost and availability of the nozzles; the standard nozzle is $27 on the Flashforge site, and the high temperature nozzle is $45.
Whether or not this is an issue depends on your situation: a print farm operator looking for the highest possible uptime likely won’t be concerned about the cost given the ease of replacement, but a hobbyist who is used to purchasing nozzles in packages of 30 for $9.98 will probably be put off by the relatively high cost.


The Adventurer 4 has an integrated webcam for monitoring prints as well as recording timelapses. Unfortunately, the placement of the webcam is directly behind the ribbon cable attached to the nozzle assembly, which obscures the webcam for the initial part of the print. In addition, the webcam is designed to be viewed and monitored from the cloud services such as Polar3D and FlashCloud, neither of which I was able to access due to Wi-Fi connectivity issues (more on that later).
The webcam captures pictures at a resolution of 640 x 480, which is acceptable for a thumbnail or a preview, but it’s underwhelming when compared to even a low-resolution front-facing webcam on a laptop or phone. In addition, the light from the hot end assembly makes it very difficult to make out what’s being printed, so this webcam really only serves to confirm that the print has not failed. The webcam is a good example of where the execution of this machine falls short of the listed specs; an integrated webcam that can create a timelapse is a big benefit, but the limitations of the webcam on the Adventurer 4 felt too lackluster to consider for regular use.


I mentioned this issue to Flashforge, and they sent me an email with a 3D printable clip that keeps the FFC cable from sagging in front of the webcam. While this does solve the immediate problem, it doesn’t feel like a permanent solution. Flashforge indicated that this clip would be included with the 3D printer at the time of release, but it’s unclear if the company will supply a 3D model or an actual printed part.

The motion system hardware of the Adventurer 4 is top-notch, with dual linear rods on the X axis, the Y axis, and Z axis. In addition, the Z axis features dual threaded rods, which gives the entire printer a mechanically solid appearance and provides equally impressive performance. I was impressed with the hardware systems of the printer; it feels solid and reliable and is clearly designed for long-term use.

The air filter on the Adventurer 4 is located in the rear of the printer, and uses a replaceable cartridge to filter the exhaust from the printer. I liked this filter because it allowed me to print with virtually no odor, but the noise from the fan was surprisingly loud and was hard for me to ignore. The printer uses silent stepper drivers for quiet operation, but the fan can easily be heard from across a room. If Flashforge had included a silent or less noisy fan with the printer, it would be more in line with the volume I would expect from a printer with silent stepper drivers and an enclosed build chamber. Printing with PETG, I didn’t notice any odor from the printer when the door was shut, and the filter appeared to effectively prevent any smells from escaping the build chamber.

The Adventurer 4 includes the ability to resume a print after a power outage. I was able to test this feature when printing a model by triggering the power switch on a surge strip during printing. After turning the power to the machine back on, I was prompted to continue the print on the touchscreen. Selecting ‘Yes’ caused the printer to heat the nozzle and bed before resuming the print.

Unfortunately, this pause left a defect on the side of the model where the print had stopped. The similarly-priced Prusa MK3S+ has a similar ‘Power Panic’ function, but the printer will automatically move the nozzle to the side of the machine and away from the part to prevent any material from oozing from the nozzle into the part. A similar technique could (and should) be implemented here to really make this feature a success.
Calibrating the Flashforge Adventurer 4

Flashforge advertises the Adventurer 4 as featuring an auto-leveling build platform, but that’s a bit of a stretch. Unlike a printer like the Anycubic Vyper which goes through an entire calibration process with no operator input required, the Adventurer 4 probes nine points on the bed and prompts the user to confirm the Z height at each point. This is the same type of semi-automated leveling used by the Flashforge Adventurer 3 Lite, which probes various points on the bed and requires user input at each step.

Leveling process naming convention aside, the Adventurer 4 is advertised as including a ‘leveling-free platform design’ due to the 8mm solid aluminum CNC-machined plate used as a mounting base, and I found this to be accurate. After setting the Z-offset height, the Adventurer 4 trammed the bed to nine points across the build platform, and they were all perfectly uniform. From a hardware perspective, this shows that time and attention was given to the problem of bed calibration, but adding a strain gauge or BLTouch sensor to the nozzle assembly would make this printer fully automated which should be expected from a machine in this price range.
Build Platform on Flashforge Adventurer 4

The FlashForge Adventurer 4 uses a textured removable flexible magnetic print bed that is similar to the platform used on the Adventurer 3 Lite, but includes several improvements. The bed is held in place magnetically, and uses two locating slots on the rear of the base that I was able to slide it into easily. The textured surface offers excellent adhesion, and I didn’t experience a single part delamination during testing. As advertised, the CNC machined heated platform is level and consistent, and the auto-leveling process confirmed that there was no more than .1mm difference in height across any of the nine calibration points.

Flashforge added blue grip bars to the sides and front of the flexible platform, which make it easy to remove the build platform without directly touching the heated surface. As opposed to the flexible platforms available on 3D printers like the Anycubic Vyper, it’s possible to bend this platform without leaving fingerprints or any oils on the surface, which can reduce the adhesion of the surface and cause builds to fail. I was surprised with how much of a difference this makes when removing prints, and this is a feature I hope to see present on more machines in the future.
Printing on the Flashforge Adventurer 4

The Flashforge Adventurer 4 includes several test prints on the USB thumb drive, but I found that only some of them actually worked. Selecting the ‘Tall_Container_Top.gx’ or ‘Tall_Container_Bottom.gx’ files resulted in a ‘Try Again’ error, which persisted even after restarting the machine and copying the files to a different drive. I was able to get ‘tool_changing_station.gx’ to print, which prints out in a brisk hour and a half and uses under 15 grams of material.


The tool changing station printed without any major issues, but the quality of the included transparent red PLA spool was a little low, and there was stringing present in the model and the seams, top layers, and bottom layers looked a little bit coarser than I like to see from a demo print. The purpose of the tool changing station is unclear, and I couldn’t find any documentation in the user manual or online as to how it’s supposed to be used. I like the idea of including functional tools for the printer as included test prints, but including instructions would be even more useful.
Printing with Wi-Fi on the FlashForge Adventurer 4

The Flashforge Adventurer 4 features the ability to print via Wi-Fi, Ethernet, and USB thumb drive. FlashPrint features a Multi-Machine Control mode, which is designed for users building a networked print farm that uses a single computer as a control point. Multi-Machine Control is available for both Ethernet and WiFi connections, and only requires the printer(s) and computer to be active on the same network.


Unfortunately, I wasn’t able to get the Wi-Fi connection on the machine to work, owing in part to a unique error that popped up on the Adventurer 4. The built-in keyboard on the LCD touchscreen is used to input a network password, but selecting the Shift key causes the lowercase x to turn into an uppercase S, preventing a password with that character from being used. I wound up using a USB keyboard, plugged into the front of the printer, to input my network password, but that still didn’t get the printer on my network.
I contacted Flashforge to troubleshoot this issue, but they indicated that the Adventurer 4 will not be compatible with the FlashPrint software using Wi-Fi, at least for now. Per FlashForge Support: “Yes, you can still use the Adventurer 4 with FlashPrint 4.6.4 however it can only work via USB drive where you save the file onto the USB drive and then plug the USB into the printer. We have tried transferring the file over Wi-Fi however it does not work and gives the same error message as you have received.”
This seems like an issue that could be resolved via a firmware update, but at present this system has built-in Wi-Fi that simply does not work.
Slicing Software for the Flashforge Adventurer 4

Just like the Flashforge Adventurer 3 Lite, the Flashforge Adventurer 4 uses FlashPrint for generating 3D printable models. This software is designed with an intuitive and simplified interface that is clearly geared towards beginners with only a handful of settings initially visible and able to be modified. The Adventurer 4 ships with FlashPrint 4.6.4, which is the latest version of the software available as of the writing of this article.


Unfortunately, slicer support for the Adventurer 4 appears to still be in production for FlashPrint. When selecting ‘Machine Type’, the Adventurer 3 has four available profiles for determining print quality; Low (Faster), Standard, High (Slower), and Hyper. The Adventurer 4 only has a single profile; Standard. The Standard profile for the Adventurer 3 series uses .18mm layer height for Z resolution, while the Standard profile for the Adventurer 4 uses a layer height of .2mm resolution, which will result in coarser prints.
FlashPrint Standard Settings for the Flashforge Adventurer 4
| Layer Height | 0.20 mm |
| Infill Percentage | 15%, Hexagonal |
| Print Speed | 60mm/second |
| Extruder Temperature | 210 degrees Celsius (410 degrees Fahrenheit) |
| Heated Bed Temp | 45 degrees Celsius (113 degrees Fahrenheit) |
| Print Time | 1 Hour, 27 Minutes |

Printed using the included spool of transparent red PLA filament, the 3DBenchy test model has some quality issues that are worth investigating a little further. Just like the first test print I did (the tool changing station), the Benchy showed stringing and a rough surface finish, and was also very difficult to detach from the raft. These are problems I typically associate with poor quality filament, not necessarily 3D printer hardware or software. I swapped out the spool for a known good spool of Eryone Blue PLA+ and reprinted the model a second time.

The second Benchy printed without any stringing, and the raft detached easily and without any issues. This print restored my confidence in the hardware of the Adventurer 4; the printer is clearly capable of making high-quality parts but the included spool of filament will likely result in a less-than-impressive first print. This can be a real stumbling block for beginners, and a less experienced user could spend hours tweaking settings and adjusting the printer instead of just swapping out the material.
FlashPrint Normal Settings for the Flashforge Adventurer 4 / Standard Print

| Layer Height | 0.20mm |
| Infill Percentage | 15%, Hexagonal |
| Print Speed | 60mm/second |
| Extruder Temperature | 210 degrees Celsius (410 degrees Fahrenheit) |
| Heated Bed Temp | 45 degrees Celsius (113 degrees Fahrenheit) |
| Print Time | 11 Hours, 52 Minutes |
| Row 7 - Cell 0 |

Using the default settings in FlashPrint, I tried a slightly more ambitious print that takes up more of the available print volume of the Flashforge Adventurer 4. The Decoration Cube by Ben Sch is a clean geometric shape that is ideal for determining print quality and consistency. At a 15% hexagonal infill, this decorative cube also has a wide enough footprint to test the adhesive quality of the build surface and see if a dense model will delaminate as the part cools and shrinks.


The cube, which took just under 12 hours to print using default settings, has even and consistent layers. The Adventurer 4 features a robust hardware motion system and this print definitely shows what the machine is capable of. The dual X, dual Y, and dual Z linear rods provide exceptional stability and the rapid cooling provided by the part cooling fan results in layers that look like what you would expect from a $799 machine.
FlashPrint Normal Settings for the Flashforge Adventurer 4 / Large Print

| Layer Height | 0.20mm |
| Infill Percentage | 6%, Line |
| Print Speed | 60mm/second |
| Extruder Temperature | 210 degrees Celsius (410 degrees Fahrenheit) |
| Heated Bed Temp | 45 degrees Celsius (113 degrees Fahrenheit) |
| Print Time | 25 Hours, 19 Minutes |

Printing the Desert’s Kiss Dice Tower Diorama by Ars Moriendi 3D proved to be a bit of a challenge, and this 25 hour print showed that while the hardware of the Adventurer 4 is rock-solid, the software might take some tweaking to get solid results. The dice tower printed out with excellent detail on the top and bottom of the skull, and even the shallowest of the organic curves looks clean and well-defined.


Unfortunately, some of the small pillars in the model showed underextrusion, and this is worth examining more closely. This underextrusion caused one of the small pillars to detach while printing, and others showed hollow voids throughout several of the layers on the other pillars. Switching to the Expert mode on FlashPrint, I found the default extrusion rate on the printer is set to 96% (as opposed to the default of 100%), which means that the printer may not extrude enough material after a filament retraction to complete a small loop where only a small amount of material is deposited.

Bottom Line

It’s hard to deny the Flashforge Adventurer 4 is a well-built machine, with enough hardware features to justify the $799 price tag. Unfortunately, the FlashPrint software integration left me wondering if this machine is ready for release. The lack of available profiles is definitely an issue; new users shouldn’t be expected to make their own from scratch, and advanced users will be surprised by the single profile provided.
In addition, the issues I ran into trying to print the sample part and connecting to Wi-Fi both felt like easy-to-solve problems that should have been caught by Flashforge before release. The ability to resume printing a part after a power outage is a benefit to users concerned about losing large prints that take significant amounts of time, but unlike the Prusa MK3S+ (which moves the extruder away from the part after an outage), the part will have a defect where the nozzle stops due to the lack of movement.
I was really impressed with the Flashforge Adventurer 3 Lite, and some of the primary issues I had with the machine were addressed in the Adventurer 4. Unfortunately, the larger spool holder and increased build volume are overshadowed by the software issues I encountered. Should Flashforge fix these issues with software and firmware updates, our outlook could change. At this point, considering the price of this machine, it’s hard to recommend it over a printer like the Anycubic Vyper which offers larger build volume, a faster auto-leveling process and more for less than half the price. However, if safety is a primary concern, the enclosed nature of the Adventurer 4 could be the deciding factor.
